 Why should you build a kegerator? Let me tell you:
1) Building a kegerator will save you money:
After the expense of building a kegerator (less than $200 if you search carefully), you will be saving about 25 cents per pint. The average American drinks about 1.3 drinks a day, which means you can save over $100 a year – per person.
2) Tap beer tastes better than cans or bottles:
Most people know that the three worst things for beer are heat, light and oxygen. Drinking beer from a keg is the best way to get the best beer possible. In a kegerator, your beer is always temperature controlled, sealed from light, and has less surface area against any possible oxidized metal.
3) Kegs are easier than bottles:
Because you will now have a refrigerator dedicated to beer you will now have more room for food in your normal refrigerator. Also, if you are a homebrewer, it is much easier to fill one keg than to fill 50 bottles (plus force carbonation means you don’t have to wait a week for your beer to carbonate).
4) Having a tap system is cool:
With a tap system you can pour as much beer as you want. Do you have an Oktoberfest stein? Fill er’ up! Are you looking for a midnight sip? Drinking a half pint has never been easier. Plus when friends want a drink, pulling the tap handle is more fun that finding a bottle opener.
Building a kegerator in six easy steps:
What you’ll need:
1) Tools – A power drill will be your best friend. It will also help if you have a drill set that can drill 1 3/8” holes, a tape measure, a level, and a large adjustable wrench.
2) A Refrigerator – I suggest finding a used one. I got mine for free from a neighbor but you can usually find some for less than $100 on Craigslist.
3) CO2 Tank – I have a 20 pound tank that barely fits inside my kegerator, I suggest getting a 10 pound tank unless you KNOW a bigger one will fit. Also, do a quick search or ask a local homebrew shop as to where you can fill or exchange tanks.
4) A Kegerator Kit – Found online or at homebrew shops. It will need to consist of a regulator, faucet shanks and taps, air and beer hosing, a drip tray, and keg couplers that will fit the type of beer you intend to tap. Optional items consist of multiple regulators and taps, tap handles, and CO2 gas manifolds.
Step One – Plan:
Once you have a refrigerator it is best if you decide how you want to set it up. The fun part about having a kegerator is that you can customize it however you want. If you plan on only buying 15.5 gallon kegs you will probably only want one tap, if you plan only serving homebrew or 5 gallon kegs you might be able to fit up to four kegs. I will show you how I build mine, but yours might not be the same for every set-up.
Step Two – Strip:
What I did in order to fit four homebrew kegs and a 20 pound CO2 tank into my refrigerator was to strip out all of the vegetable drawers and make a stronger wooden shelf capable of holding much more weight. I highly suggest building a cheap shelf and coating it in polyurethane for easy cleaning (painting it is optional).
Step Three – Drill Baby, Drill:
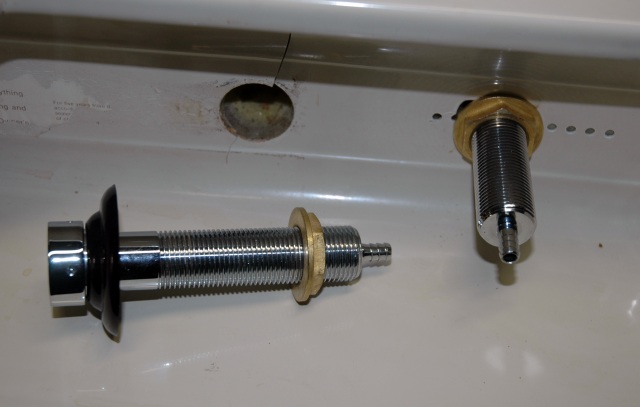
Decide where you want your tap(s). Only drill through the refrigerator door, if you drill on any of the walls you risk ruining the insulation (This is especially true if you are using a chest freezer.) If you plan on having long tap handles, make sure you have room above them to open the freezer. Also look on the inside and make sure your shank placement does not go through a shelf at an awkward angle. Once you have your targets lined up and level, drill slowly.
Step Four – Regulation:
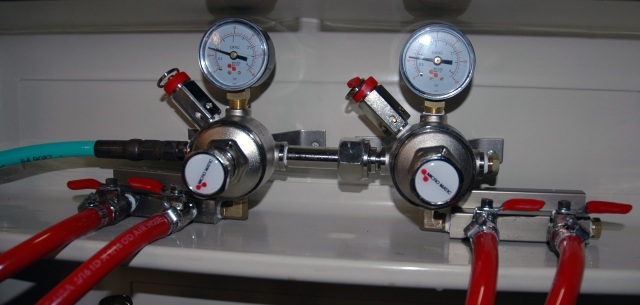
Figure out where you would like your CO2 tank, regulator(s), and possible manifolds to go. My setup took a little time to figure out but it was totally worth it in the end. You can have the regulator attached to the tank, but I wanted to have multiple regulators and manifolds that are too tall when fitted on my tank to fit inside. I decided to mount my set up on the inside of the door with a pressure certified hose running to the tank.
Step Five – Beer Lines:
This part is easy; install the shanks, taps, and any hosing to and from the keg couplers. I am using clear hosing for beer lines and red hosing for pressurized air hose. I am also using clamps for extra connection strength. I made sure I had enough hosing that I could open the kegerator and not have to worry about pulling lines out of their connections. I am also using homebrew keg connections, but a professional keg coupler is just as easy to use (each coupler gets one beer hose and one air hose, and they should all be labeled).
Step Six – Check and Serve
Before you add beer to the equation make sure everything is connected properly. Open the CO2 tank slightly and listen for any unwanted leaks. If good, then hook up the beer and pour yourself your first pint. Enjoy. Now you can think about adding stickers and signage.
